Quickstart
Run TRUSCA on your laptop in about 5 minutes. This page gives you a populated dashboard you can click through — and, in step 5, your first scan of a real repository. For a production deployment, see Install with Docker Compose or the Helm chart.
Prerequisites
- Docker +
docker-compose(V1, hyphenated) — V2 plugin also works. - 4 vCPU / 8 GB RAM free, 10 GB free disk.
1. Start the stack
Clone the repository and create your env file:
git clone https://github.com/trustedoss/trusca.git
cd trusca
cp .env.example .env
The dev image runs uvicorn --reload directly, so — unlike the production
image — it does not auto-apply migrations on boot. Create the schema first, so
the backend reports healthy as soon as it starts (otherwise the
health-gated celery-worker blocks up):
docker-compose -f docker-compose.dev.yml run --rm backend alembic upgrade head
Then bring the full stack up:
docker-compose -f docker-compose.dev.yml up -d
The schema is already applied, so postgres, redis, backend,
celery-worker, and frontend report healthy within about 30 seconds
(docker-compose -f docker-compose.dev.yml ps).
2. Seed the demo dataset
docker-compose -f docker-compose.dev.yml exec backend \
  python -m scripts.seed_demo --demo-only
This creates one organization, three teams, five users, five projects, plus
a realistic mix of CVEs, license findings, and obligations — about
10 seconds. (--demo-only skips the internal verification fixtures the
nightly spec harness seeds by default, so the project list matches this
guide exactly.)
3. Sign in
Open http://localhost:5173 and sign in:
| Account | Password | |
|---|---|---|
| Super admin | admin@demo.trustedoss.dev | DemoTest2026! |
| Team admin | frontend-admin@demo.trustedoss.dev | DemoTest2026! |
| Developer | dev@demo.trustedoss.dev | DemoTest2026! |
The demo password is set in .env.example and is intentionally weak — never
reuse it on a host that anyone else can reach.
4. Look around
- Dashboard (
/) — org-wide severity tiles + recent scans.
- Projects → frontend-admin's project — the richest dataset; click the Vulnerabilities tab to see the 7-state VEX triage flow.
- Components & licenses — the donut shows the allowed / conditional / forbidden mix.
- SBOM — download CycloneDX or SPDX.
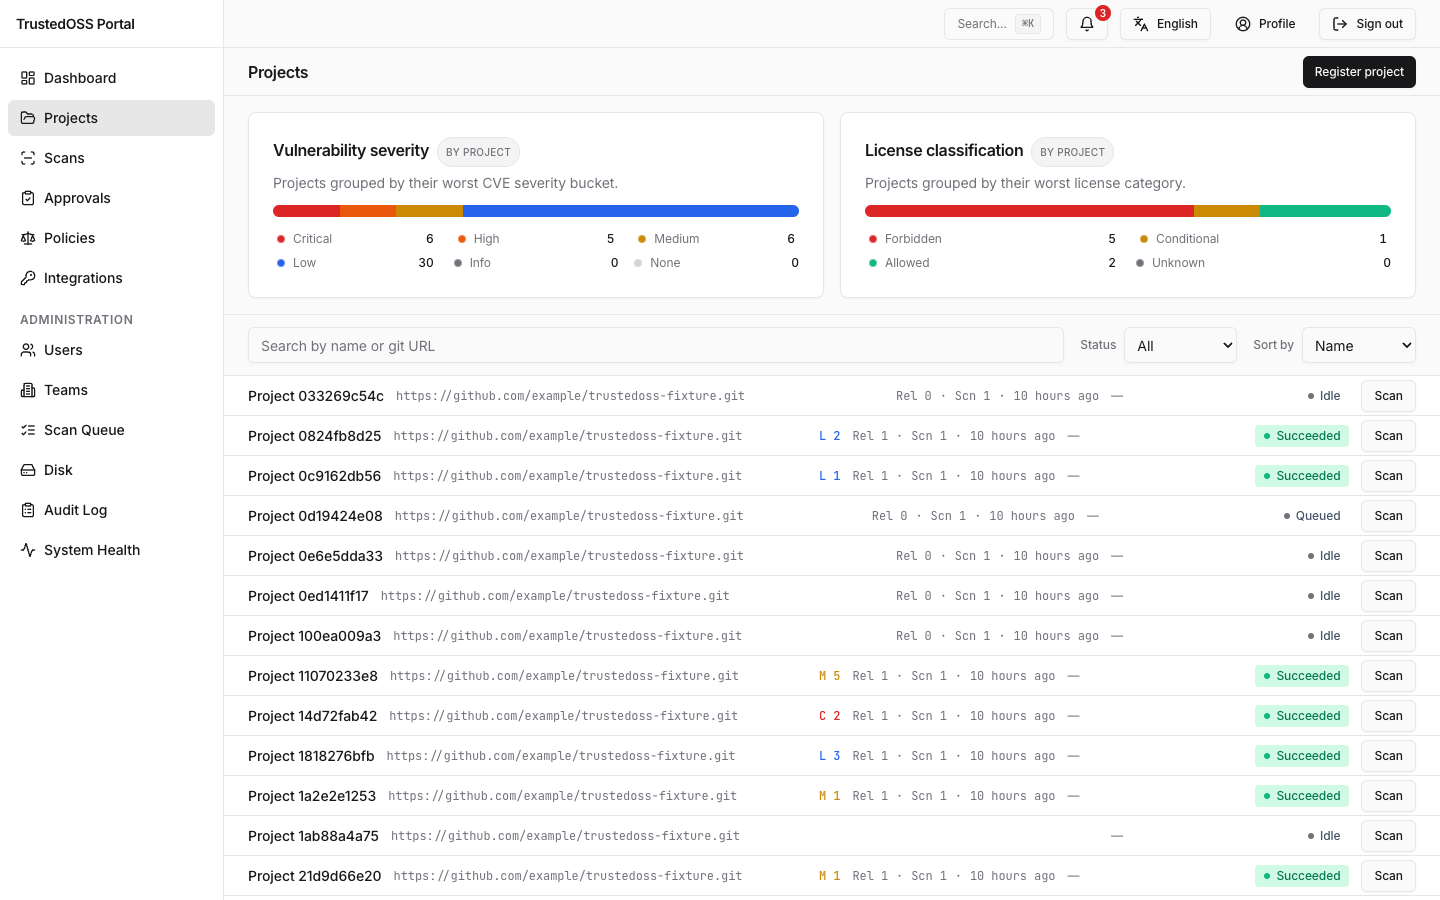
5. Scan your first real project
The seeded data shows what a triaged portfolio looks like; the real test is your own code. Still on the demo stack:
- Click Projects in the sidebar, then New project (top-right).
- Enter a Name and a public Git URL — any repository with a lockfile works — then click Create.
- Click Scan (on the project row in the list, or in the project detail header), keep the Source scan type, and click Start scan.
- A drawer streams the pipeline stages live (fetch → cdxgen → scancode → vuln match → finalize). A small repository takes a few minutes; you can close the tab — the scan keeps running on the worker.
- When the scan succeeds, the Components tab lists what was found and the Vulnerabilities tab shows the open findings — switch it to the By upgrade view for the exact version bumps that would clear them.
On a fresh stack the worker downloads the Trivy vulnerability database in the background (1–3 minutes with internet egress). A scan that finishes before the download does shows its components but zero vulnerabilities — that is the DB still arriving, not a clean bill of health. No re-scan is needed: the automatic re-match fills the findings in once the DB lands. See Vulnerability data.
A private repository needs a credential first — see Private repositories. The full scan reference (container scans, SBOM upload, cancelling, troubleshooting) is Scans.
What next
- Wire it into CI → GitHub Actions, GitLab CI, or Jenkins.
- Operate it for a team → Users & teams, Backup & restore.
- Move to production → Install with Docker Compose.
Stop the stack
docker-compose -f docker-compose.dev.yml down
Add -v to also drop the database volume.